Raspberry Pi CM5 İlk Kurulum Sonrası Boot Etmiyorsa Ne Yapmalısınız?
Raspberry Pi Compute Module 5 (CM5) kurulumunda karşılaşılabilecek en can sıkıcı sorunlardan biri cihazın hiç açılmıyor gibi görünmesidir.
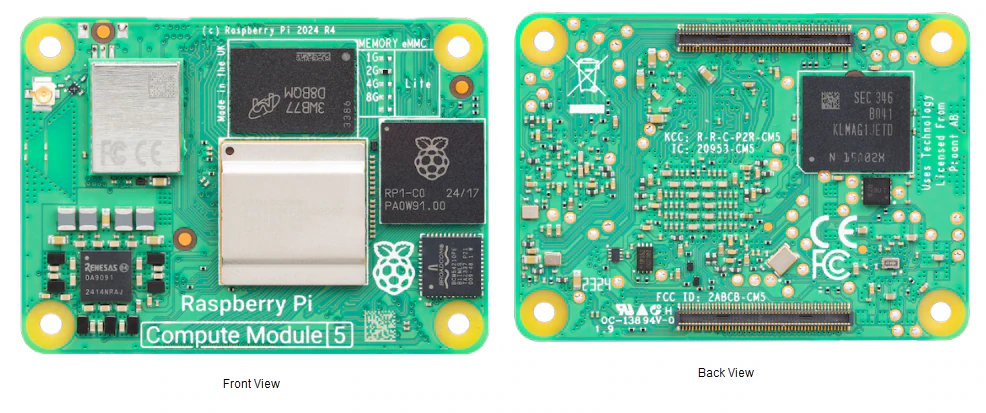
Kullandığımız Raspberry Pi Compute Module 5 (2 GB RAM, 32 GB eMMC) üzerinde benzer bir problem yaşadık.
İlk bakışta donanım arızası gibi görünen bu sorun aslında çok farklı bir sebepten kaynaklanabiliyor.
Bu yazıda yaşadığımız teşhis sürecini ve ulaştığımız sonucu detaylı olarak paylaşıyorum.
Belirtiler
Kurulum sonrasında cihaz şu şekilde davranıyordu:
- Kırmızı güç LED’i sürekli yanıyordu
- ACT (yeşil) LED hiç yanmıyordu
- HDMI çıkışında görüntü yoktu
- SSH bağlantısı kurulamıyordu
- Ağ üzerinde görünmüyordu
- Seri konsol (UART) normal boot sırasında tamamen sessizdi
İlk bakışta aşağıdaki ihtimaller değerlendirildi:
- CM5 arızası
- eMMC arızası
- Güç problemi
- Bootloader problemi
- Raspberry Pi OS kurulum hatası
İlk Şüphe: Donanım Arızası
Birçok kullanıcı gibi ilk düşüncemiz modülün arızalı olabileceğiydi.
Ancak rpiboot aracı kullanılarak yapılan testlerde cihazın USB Boot moduna geçtiği görüldü.
Windows tarafında cihaz:
BCM2712 Boot
olarak algılanıyordu.
Bu sonuç çok önemliydi çünkü:
- BCM2712 işlemci çalışıyordu
- Dahili ROM boot kodu çalışıyordu
- USB Boot mekanizması çalışıyordu
Yani cihaz tamamen ölü değildi.
eMMC Gerçekten Çalışıyor Muydu?
rpiboot kullanılarak eMMC erişimi test edildi.
Sistem:
mmcblk0
olarak görünüyordu.
Yaklaşık 29 GB kapasite doğru şekilde okunuyordu.
Bu da:
eMMC donanımı sağlam
sonucunu ortaya koydu.
Raspberry Pi OS Yeniden Yazıldı
Sorunun işletim sistemi kaynaklı olabileceği düşünülerek aşağıdaki kurulumlar tekrar tekrar yapıldı:
- Raspberry Pi OS Desktop 64-bit
- Raspberry Pi OS Lite 64-bit
Her yazma işlemi başarıyla tamamlandı.
Ancak sonuç değişmedi:
- Kırmızı LED sabit yanmaya devam etti
- ACT LED çalışmadı
- HDMI görüntüsü gelmedi
Bu aşamada sorun hâlâ çözülememişti.
Asıl Kırılma Noktası: UART Bağlantısı
CM5’e TTL/UART bağlantısı yapıldı.
rpiboot üzerinden açılan sistemde aşağıdaki çıktı görüldü:
Raspberry Pi 64-bit Mass Storage Gadget
rpimsg login: root (automatic login)
#
Bu noktada çok kritik bir gerçek ortaya çıktı.
Aslında:
- Linux çalışıyordu
- UART çalışıyordu
- Ethernet çalışıyordu
- Ağ yığını çalışıyordu
Yani işlemci, RAM ve temel donanım tamamen sağlıklıydı.
Boot Dosyaları Gerçekten Yerinde Miydi?
eMMC üzerindeki dosya sistemi incelendi.
Root filesystem sorunsuz açılıyordu:
Debian GNU/Linux 13 (trixie)
Boot bölümünde ise şu dosyalar eksiksiz mevcuttu:
kernel_2712.img
config.txt
cmdline.txt
start4.elf
fixup4.dat
initramfs
Dolayısıyla:
- Eksik kernel
- Eksik firmware
- Eksik boot dosyası
olasılıkları da elendi.
Peki Sorun Neydi?
İşte burada önemli bir detay ortaya çıktı.
Sorun yaşanırken cihaz sürekli USB Boot modunda test ediliyordu.
Normal boot denemeleri sırasında:
- USB Boot jumperı
- eMMC disable jumperı
- USB bağlantıları
defalarca değiştirildi.
Yapılan incelemeler sonucunda donanımın aslında çalıştığı ve işletim sistemi dosyalarının doğru yazıldığı görüldü.
Yeni bir Raspberry Pi OS Lite kurulumu sonrasında cihaz normal güç verilerek tekrar denendiğinde sistem sorunsuz şekilde boot etti.
Çözüm
Bizim senaryomuzda sorun:
- İşlemci arızası değildi
- RAM arızası değildi
- eMMC arızası değildi
- Bozuk Raspberry Pi OS değildi
Asıl problem:
Boot sürecinin yanlış teşhis edilmesi ve
USB Boot / eMMC Boot geçişlerinin karışması
oldu.
Kurulum yeniden yapıldıktan ve cihaz normal eMMC boot modunda çalıştırıldıktan sonra sistem sorunsuz şekilde açıldı.
İlginç olan nokta ise EEPROM Recovery hazırlıkları yapılmasına rağmen EEPROM flashlama aşamasına hiç ihtiyaç duyulmamasıydı.
Bu Sorunu Yaşıyorsanız Kontrol Edin
Aşağıdaki maddeleri tek tek doğrulayın:
1. rpiboot cihazı görüyor mu?
BCM2712 Boot
görüyorsanız işlemci çalışıyor demektir.
2. eMMC görünüyor mu?
mmcblk0
görünüyorsa eMMC büyük ihtimalle sağlamdır.
3. Raspberry Pi OS gerçekten yazıldı mı?
Yazma sonrası boot bölümünde:
config.txt
cmdline.txt
start4.elf
fixup4.dat
dosyaları bulunmalıdır.
4. UART ile test edin
UART çıktısı birçok durumda HDMI’dan daha fazla bilgi verir.
5. Hemen donanım arızası sonucuna varmayın
Kırmızı LED’in yanıyor olması tek başına CM5’in arızalı olduğu anlamına gelmez.
Sonuç
Bu süreçte ulaştığımız en önemli sonuç şuydu:
CM5 tamamen bozuk görünse bile
işlemci, RAM, eMMC ve Linux tarafı aslında çalışıyor olabilir.
Özellikle:
- Sürekli kırmızı LED
- Siyah ekran
- SSH erişilememesi
durumlarında doğrudan donanımı suçlamak yerine önce:
- rpiboot
- UART
- eMMC erişimi
- Boot dosyaları
kontrol edilmelidir.
https://github.com/raspberrypi/usbboot/blob/master/recovery5/README.md
Bu repoyu boot işleminde kullandık. WSL kurmanız da gerekiyor repoyu kullanabilmeniz için.
Bizim vakamızda cihaz kurtarılabildi ve normal şekilde çalışmaya devam etti.
What Should You Do If Your Raspberry Pi CM5 Won’t Boot After Initial Setup?
One of the most frustrating issues you may encounter during a Raspberry Pi Compute Module 5 (CM5) installation is when the device appears completely dead and refuses to boot.
We experienced a very similar issue on a Raspberry Pi Compute Module 5 (2 GB RAM, 32 GB eMMC) that we were preparing for our DigiPestControl LoRa Gateway project.
At first glance, the problem looked like a hardware failure. However, the actual cause turned out to be very different.
In this article, I will walk through the entire troubleshooting process and explain how we eventually resolved the issue.
Symptoms
After the initial installation, the device behaved as follows:
- The red power LED remained permanently on.
- The ACT (green) LED never lit up.
- No HDMI output was displayed.
- SSH connections could not be established.
- The device did not appear on the network.
- The UART serial console remained completely silent during normal boot.
At first, several possibilities were considered:
- CM5 hardware failure
- eMMC failure
- Power supply issues
- Bootloader problems
- Raspberry Pi OS installation problems
First Suspicion: Hardware Failure
Like many users, our first assumption was that the module itself might be defective.
However, testing with the rpiboot utility showed that the device successfully entered USB Boot mode.
Windows detected the device as:
BCM2712 Boot
This was an extremely important finding because it confirmed that:
- The BCM2712 processor was functioning correctly.
- The internal ROM boot code was working.
- The USB Boot mechanism was operational.
In other words:
The CM5 was not dead.
Was the eMMC Actually Working?
The next step was to verify eMMC access through rpiboot.
The system detected:
mmcblk0
with approximately 29 GB of available storage.
This indicated that:
The eMMC hardware was functioning properly.
Reinstalling Raspberry Pi OS
Suspecting a corrupted operating system, we repeatedly installed:
- Raspberry Pi OS Desktop 64-bit
- Raspberry Pi OS Lite 64-bit
Every installation completed successfully.
However, the behavior remained unchanged:
- The red LED stayed permanently on.
- The ACT LED remained inactive.
- No HDMI output appeared.
At this point, the issue was still unresolved.
The Turning Point: UART Connection
A TTL/UART connection was then established to the CM5.
When booting through rpiboot, the following output appeared on the serial console:
Raspberry Pi 64-bit Mass Storage Gadget
rpimsg login: root (automatic login)
#
This discovery completely changed the direction of the investigation.
It proved that:
- Linux was running.
- UART was working.
- Ethernet was functioning.
- The TCP/IP networking stack was operational.
This meant the processor, RAM, and core hardware were actually healthy.
Were the Boot Files Present?
The eMMC file system was examined in detail.
The root file system mounted correctly and reported:
Debian GNU/Linux 13 (trixie)
The boot partition contained all required files:
kernel_2712.img
config.txt
cmdline.txt
start4.elf
fixup4.dat
initramfs
This allowed us to eliminate:
- Missing kernel files
- Missing firmware
- Missing boot files
as possible causes.
So What Was the Problem?
This is where things became interesting.
During troubleshooting, the device had been repeatedly tested in USB Boot mode.
Throughout the process, the following were changed multiple times:
- USB Boot jumper settings
- eMMC disable jumper settings
- USB connections
Further investigation showed that the hardware was actually functioning correctly and that the operating system files had been written properly.
After performing a fresh Raspberry Pi OS Lite installation and testing the device again using a normal eMMC boot sequence, the system booted successfully.
The Solution
In our case, the issue was NOT:
- A processor failure
- A RAM failure
- An eMMC failure
- A corrupted Raspberry Pi OS installation
The real problem was:
Incorrect diagnosis of the boot process
and confusion between USB Boot and eMMC Boot modes.
Once the operating system was reinstalled and the device was allowed to boot normally from eMMC, the system started successfully.
An interesting detail is that although we prepared for EEPROM recovery, we ultimately never needed to perform an EEPROM flash.
If You Are Experiencing This Issue, Check the Following
1. Does rpiboot detect the device?
If Windows shows:
BCM2712 Boot
then the processor is working.
2. Is the eMMC visible?
If you can see:
mmcblk0
then the eMMC is most likely healthy.
3. Was Raspberry Pi OS written correctly?
Verify that the boot partition contains:
config.txt
cmdline.txt
start4.elf
fixup4.dat
4. Test Through UART
UART output often provides significantly more useful diagnostic information than HDMI output.
5. Do Not Immediately Assume Hardware Failure
A permanently lit red power LED does not automatically mean the CM5 is defective.
Using Raspberry Pi Recovery Tools
During troubleshooting we also used the official Raspberry Pi USB Boot repository:
To use the recovery tools effectively on Windows, installing WSL (Windows Subsystem for Linux) may be necessary, particularly when working with the recovery5 EEPROM recovery environment.
Although EEPROM recovery preparation was completed in our case, EEPROM flashing ultimately proved unnecessary because the system booted normally once the boot configuration and testing procedure were corrected.
Conclusion
The most important lesson from this troubleshooting process was:
A CM5 can appear completely dead while
the processor, RAM, eMMC, and Linux environment are actually working perfectly.
If you encounter:
- A permanently lit red LED
- A black screen
- No SSH access
avoid immediately assuming hardware failure.
Instead, verify:
- rpiboot functionality
- UART output
- eMMC accessibility
- Boot partition contents
before concluding that the module is defective.
In our case, the device was successfully recovered and continues to operate normally.